How I Shot This: Mixed Light Music
Concept
Alyssa Ramsay is a stunning cellist who’s artistry has brought her across Canada. Besides numerous accolades and awards, what I find most impressive is her humble nature. Seeing and hearing Alyssa on stage is an encapsulating experience - the music moves through you as the bow pulls on each string.
I want to capture the unseen. Put her power on paper.
Back story: Alyssa and I grew up together in the Regina music scene (a small prairie city in Saskatchewan, Canada). She equipped with the cello, and myself on the violin. As her fame rose rapidly to the top of the artistic ladder, I… missed the ladder altogether. Anyways - let’s talk about the concept!
Using a mix of continuous lights and strobes, my goal is to freeze her upper body mid-performance, while the rest becomes lost in an organic shape of its own.
Black flags prevent continuous light from spilling on parts we intend to keep sharp (i.e. areas lit by the rear curtain sync). In pre-production, I requested Alyssa to choose full length dresses with a “sheen” (to capture light better) and to extend the length by an extra 3’/90cm. Using two assistants and a spool of fishing line, the hem is swayed left and right during the long exposure. As seen above, the bottom half of the cello, lit by continuous light, has motion blur compared to the upper half lit by the beauty dish. It’s important to note that CTB gels are used on the Profoto B1 LED modelling lights (continuous source) to balance the its colour temperature.
In this standing portrait of Alyssa, a green-gelled, gridded strip box is added. The rim light further differentiates her from the background and adds some complementary colour. Because of the dress’s extension, she’s standing on an apple box (movement once again achieved with fishing lines). The cello is being supported by a fully extended endpin.
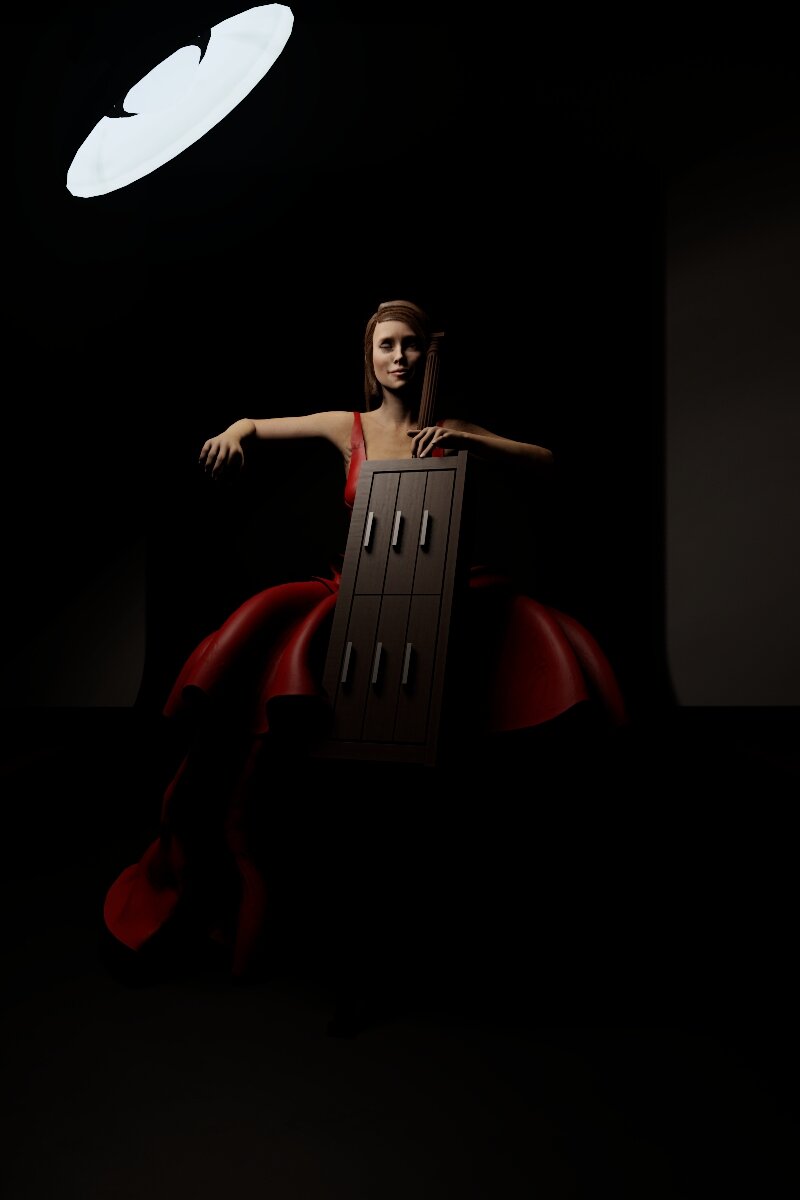
Following a wardrobe change, we take a medium portrait. Flags are raised to allow continuous light to fall on her arms. The beauty dish (still rear curtain sync) is positioned closer to Alyssa and the gelled strip box remains as our rim light.
This is actually a test shot, taken to visualize the beauty dish, minus any flags/continuous light. We all liked it - so to the portfolio it goes! Alyssa is a total sport, serenading the team with music and positive vibes throughout the shoot.
Gear
Camera: Canon EOS-5DS R
Lens: Canon EF 24-70mm f/2.8L II USM
Tripod: Sirui BSRM-3204X
Tripod head: Manfrotto MH055M8-Q5
Tethering: TetherPro to Adobe Lightroom
Lighting
Key: Profoto B1 + Mola Demi 22” White Beauty Dish + Mola Opal Diffusion Glass + Diffuser
Continuous: 4x Profoto B1 LED modelling light + Rosco Cinegel full blue CTB
Strip: Profoto B1 + Profoto RFi 1’ x 6’ Softbox + Grid + Rosco Moss Green gel
Control: 2x Matthews 24'“ x 36” Flag
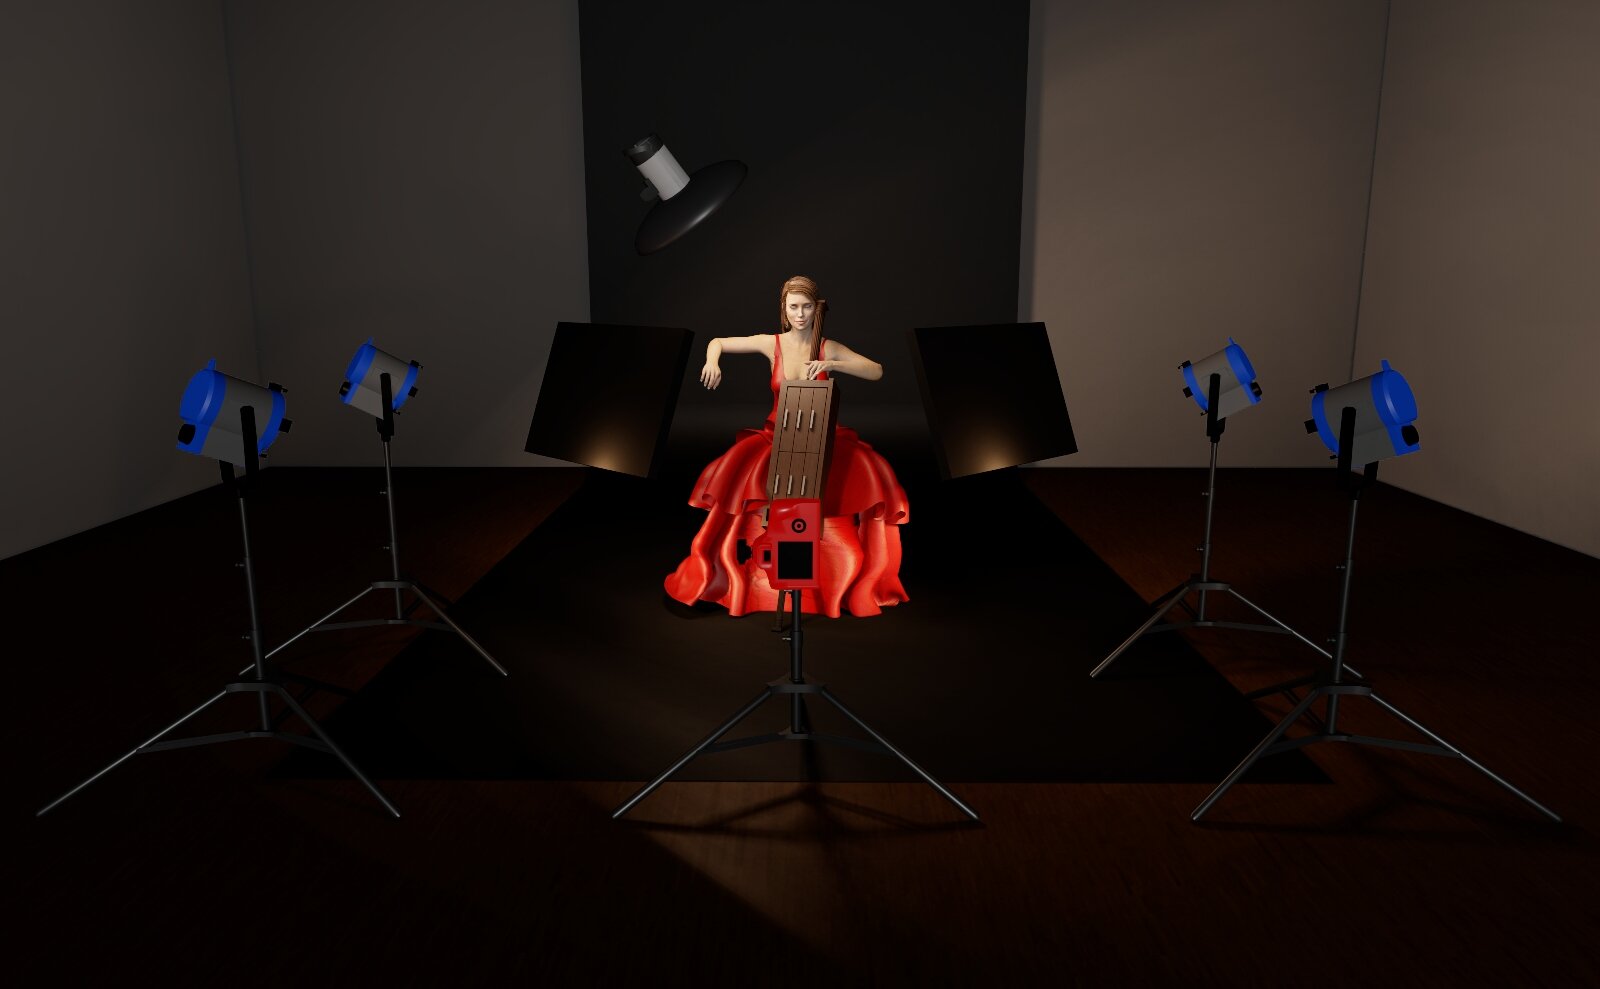
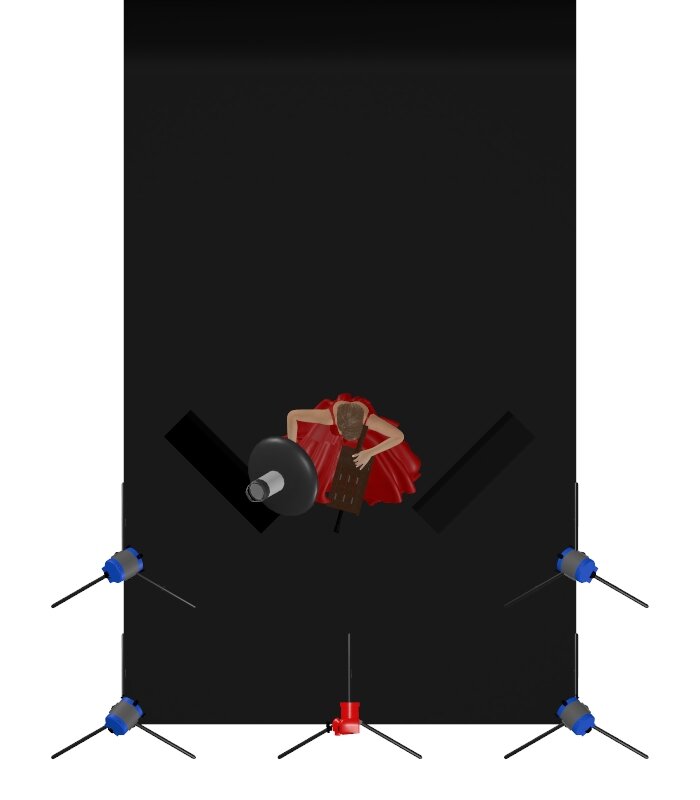
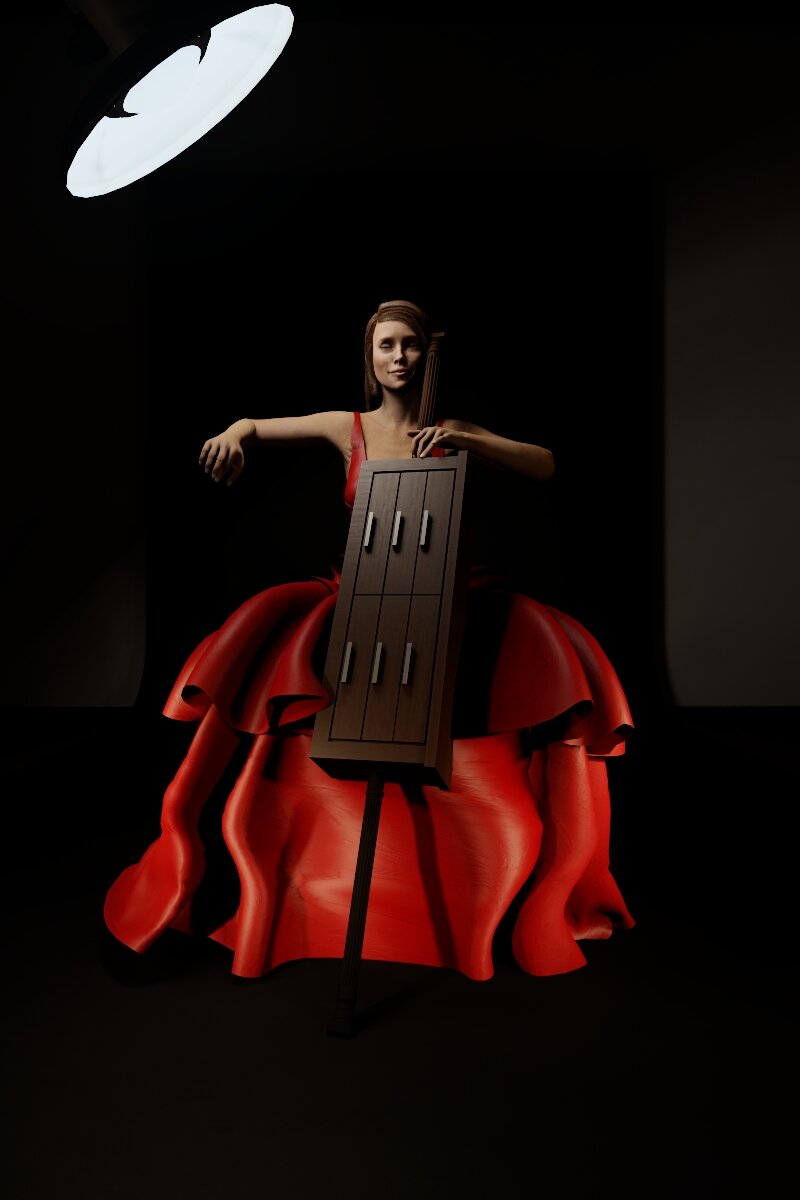
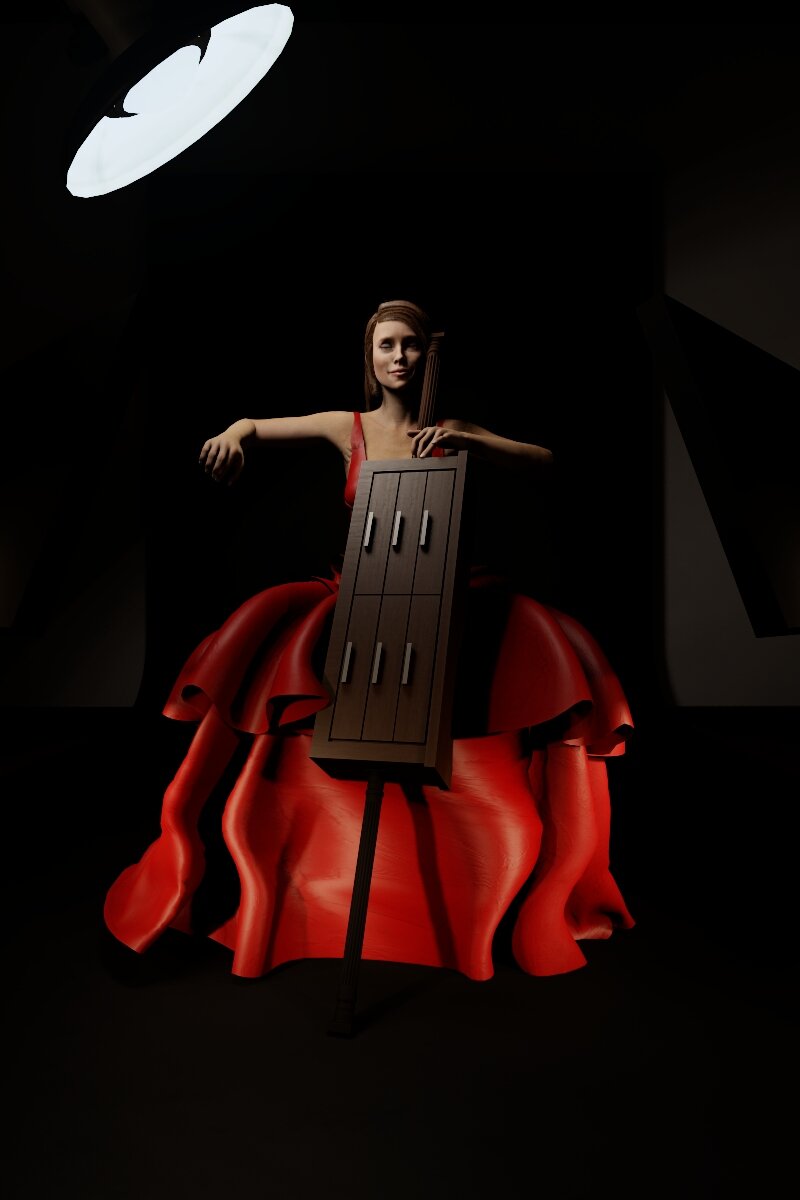
Below you’ll see the additive effect of each light: beauty dish, then with continuous lights, followed by flags. The light design program, Set a Light 3D, is an absolutely stellar program, but it doesn’t have a “cello prop”.
So I created one using a brown TV stand and two corinthian pillars.
I mean, you have corinthian pillars but not a single musical instrument? That will be my suggestion for the next firmware update: add musical hoo-has.
Editing
As usual, everything is tethered to Adobe Lightroom via a TetherPro cable. Time is spent balancing strobes with continuous light, colour temperatures, flag placement, shutter speeds, and so on. Having the photos immediately preview on the laptop saves my neck, otherwise I’m lying on the floor trying to evaluate test shots on the back of a 2.5” LCD screen.
One challenge is dragging the shutter long enough to see appreciable movement in Alyssa’s dress. Our studio is equipped with black out curtains, but even with the beauty dish at its lowest power, any shutter speed slower than 3.2s causes overexposure. Unfortunately, I choose to stop down to f/18, which leads to some slight diffraction softening.
Another challenge is that the dress extensions have a slightly different hue and luminosity compared to the original. It’s near impossible to find exact textiles, unless you’re working with the original manufacturer, so this is easily addressed in post.
Adobe Lightroom is used for basic colour correction and cropping. Then in Adobe Photoshop, the strip light and background are edited out. Very little skin retouching is required, add some dodge and burn - and voila! You have a floating cellist ready to sell out Carnegie Hall!

EXIF/SOOC
Focal Length: 26mm
Shutter Speed: 3.2s
Aperture: f/18
ISO: 100
Closing
This is a really fun shoot and learning experience. I feel that we capture Alyssa’s expressions through movement - something I’d love to dive deeper with more musicians. I encourage everyone to try mixing strobes with continuous lights and see what comes out.
My takeaway tips for those looking to experiment are:
Balance the colour temperatures of your continuous lights and strobes. As touched upon earlier, we do this by adding CTB gels on our Profoto B1 LED modelling lights.
Light control is paramount. Prevent spill of continuous or strobes where it isn’t wanted. We use black flags on C-stands, but any black cardboard will suffice.
Test various shutter speeds to achieve different amounts of “movement”. For us, hovering around the 3s mark was perfect. Anything shorter didn’t show movement and anything longer looked like a red mess.
Tether. If you’re shooting low to the ground, like I am, then tether, tether, tether. If you’re not tethering, then have a chiropractor on speed dial. Gotta PROTECT YA NECK.
Of course, nothing is perfect. Our photo was recently featured in an episode of Fstopper’s “Critique the Community”. In it, the hosts, Lee and Patrick, bring up some pointers on how they’d improve the image - namely adding some background interest as well as extending the strobe to light more of Alyssa’s bow arm. Patrick also mentions that the extended endpin is distracting, considering that everything around it is blurred.
So here are some changes I’d make for next time:
If shooting dresses again, see if it’s possible to source a dress that can be lengthened with the original material - or better yet: work with a designer that can create something unique for the shoot.
ND filter: this will allow wider apertures and avoid softening due to diffraction.
Maybe add a background light? Not sure, that’s really more of a creative choice.
Additional strobes as needed in order to light more of the upper body.
Source a location to serve as background interest and add context.
Fog machine. Bloody brilliant.
Thanks for taking the time to read another “How I Shot This” article!
Now get out and start mixing lights!
The Team
Photographer: Ian Chang Photography
Artist: Alyssa Ramsay
MUA: Gina Brass
Hair: Silvia Li
Assistants: Sam Tsang, Tony Pags, Alfred Art